I made a pretty significant upgrade to my brewing rig yesterday.
I make my beer in five gallon batches. Because my biggest pot had a five gallon capacity, I had to use what’s called the “partial boil” technique. This means that I would boil perhaps 3 gallons of water – plus all the other ingredients. At the end of the brewing process, I would transfer everything to the primary fermenter (a six gallon bucket) and top it up to five gallons from the tap. There are a couple of potential problems with this. One was sanitation: I could either boil and then cool a couple extra gallons in a second pot, or else take the risk of contamination from un-boiled water. Another problem was more subtle – experienced brewers claim that partial boil leads to darker, more burnt tasting beers – something to do with the ratio of surface area to volume on the pot.
In any event, an upgraded brew kettle was the next logical step in my hobby. Jen provided the incentive / excuse with a holiday gift, the weldless kettle valve, that would allow me to drain five gallons of liquid without lifting and tipping the pot. This is a huge advantage for the solo brewer. Five gallons of beer is about 40 pounds of unwieldy, potentially sticky stuff. A little spillage is unavoidable when you’re brewing – but so far I’ve managed to avoid catastrophic batch loss.
An aside: This was the year of small gifts that led to a big, geeky, moderately expensive upgrade and days of blissful hobbyshopping.
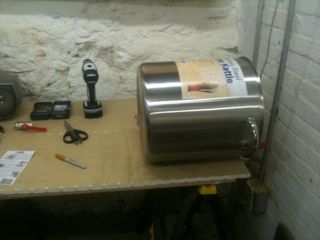
I went to the local brewing store and picked up a 30 quart (7.5 gallon), stainless steel pot, as well as the ingredients to do the Brown Ale from Sam Calagione‘s book. I’ve decided to work through the recipes in that book, in order, to expand my repertoire. For the record, mad props to the staff at Homebrew Emporium. It’s a store run by, and for, people who make our own beer. I walked in intending to go minimal and purchase the 24 quart pot. Two different employees stopped me and said, basically, “look – you’re scaling up. We’ve been there. Soon you’ll be doing all-grain recipes. The 30 quart pot is what you want – and we’ll give a 5% discount so they’re the same price. You seriously want the extra space.”
I then went to Home Depot and tried to find the equipment to drill through stainless steel. I had to put a hole in the pot for the valve to go through. The hole had to be 7/8″, which is BIG for metal rated drill bits. I wound up getting a decent set of carbide bits that top out at 1/2″, and a single 7/8″ that explicitly does not support stainless. I took the opportunity to upgrade my ear protection as well. That was a good idea.
The procedure for drilling through stainless steel is as follows:
* Mark a starter notch so the bit won’t “walk”
* Go slow. If you see smoke, that’s bad. The steel will “work harden” and turn black if overheated. Also, you’ll ruin your drill bit.
* Use heavy pressure.
* Use lots of lubricant.
* Drill a small starter hole, and work up incrementally to the actual hole.
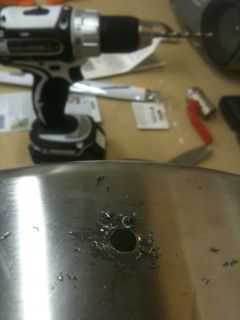
So I started here:
Drilled and cussed and sweated. Stainless is some tough and unforgiving stuff!
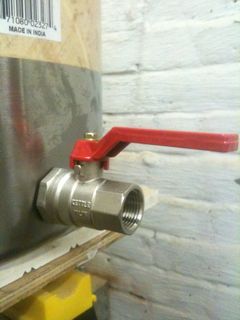
And finally got the thing right and installed!
Amazingly enough, for anyone who has seen me work with actual physical tools, it held water!
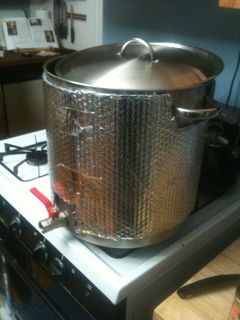
The only appropriate way to celebrate this sort of victory is to use it. A friend gave me some insulation a while ago that he had used to conserve fuel while camping. I made a little jacket out of it. I have no idea how much this helps – but I was able to sustain a good rolling boil on a single burner of my stove.
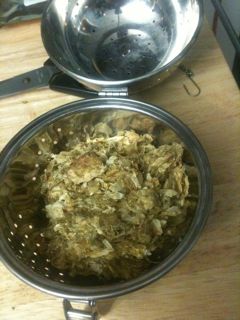
One other upgrade was to use a “rice ball” instead of a muslin sack to hold the whole leaf hops. Beer is basically grain soup, infused with hops. This let me get the hops back out of solution without a bunch of filtering.
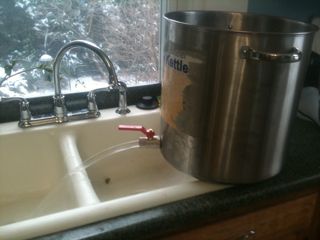
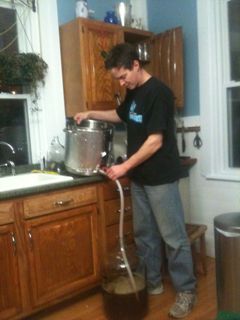
Once the batch was done and cooled, the valve came in very handy! Usually at this point I have to pour the wort through a filter into a bucket, and then through a funnel into a carboy. Instead, I used a length of high temperature silicone tubing and just shoved it in the threaded attachment of the valve. I was dubious – but it worked fine. No fancy attachments required!
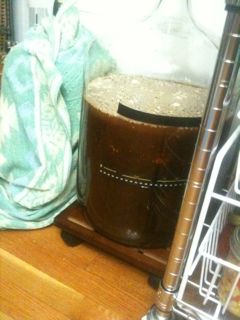
Fermentation kicked off almost immediately, and it’s happily doing its thing!
